
![]()
![]()
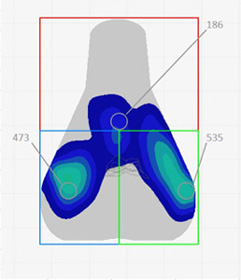
gebioMized Saddle Pressure Mapping provides the fitter and client a way to visualize the way a rider is positioned and interacting with the saddle. Previously, without this technology, this type of analysis is left to visual observation from the fitter and any feedback the rider is able to give regarding their sensations. The pressure mat is now giving us the opportunity to visualize with greater clarity the riders posture and interaction with the saddle. This has direct influence then on the quality of a riders pedaling kinematics.
Pressure mapping provides important feedback with regard to:
- Saddle selection and width
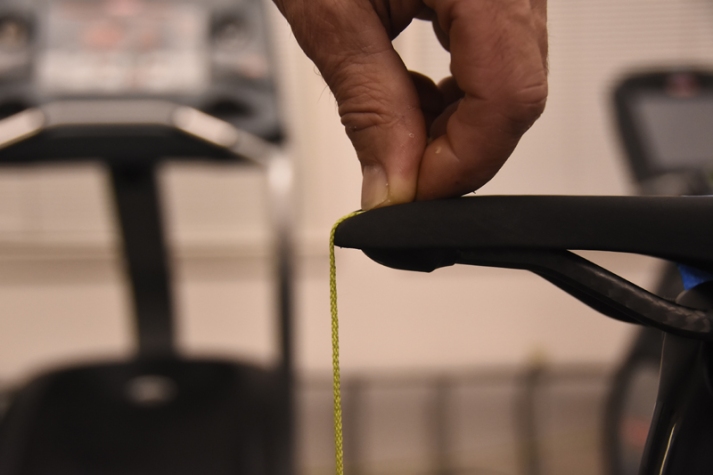
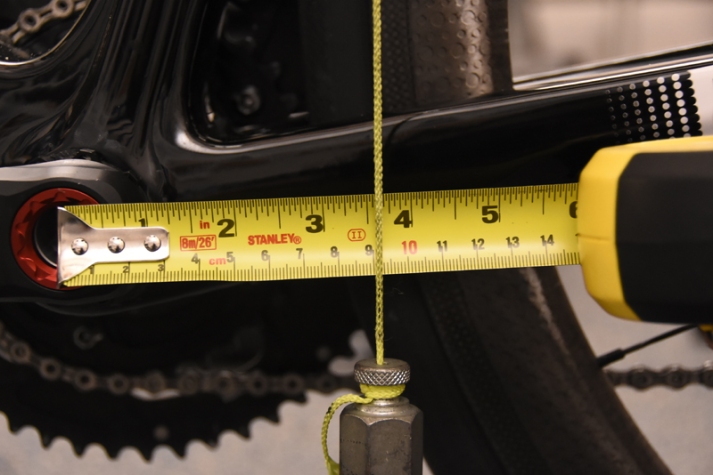
- Saddle position including height and fore aft
- Crank length
- Leg length discrepancy
- Validating and providing evidence for recommendations made during the fit
Here are a few examples:
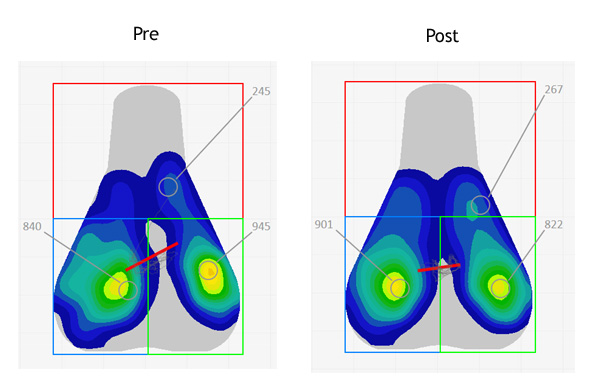
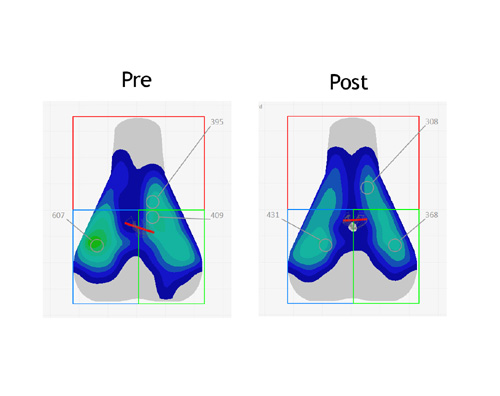
Below is a rider who was dealing with left lateral knee pain. The red line you see on the image is the line of regression or axis of movement. You can see from the image on the left this rider is rotated back and to the left placing strain on the IT band and lateral hamstring tendons. Improvements were made through changes in the saddle height, for aft and a different shape saddle was selected with the same width. A more symmetrical movement of the pelvis was achieved indicated by the more horizontal red line, and a more even positioning on the saddle. The end result being a decreased pull and strain on the tendons on the lateral aspect of the leg.
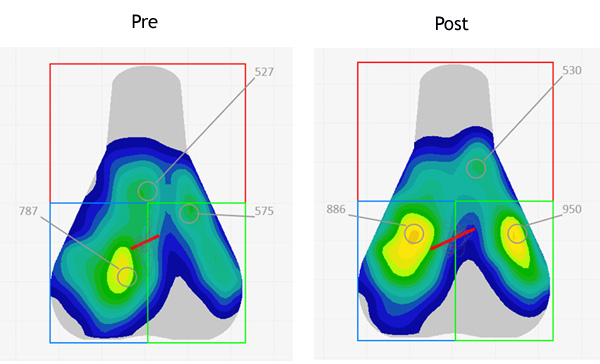
This example below is a rider with no specific pain complaints but has sensations of an assymetrical pedal stroke and is constantly shifting around on the saddle in an attempt to find a stable point. Modifications to the saddle position were made, stance width was modified, a wider saddle was selected and a different shape utilized. This rider also has a leg length discrepency. There are ways to minimize leg length differences on the bike but with SPD style pedals, the cleat/pedal interface does not tolerate using much more than 1 or 2 mm of shims before the shoe/pedal interface becomes unstable. In this case, a compromise must be made between the reach of the different legs. You can see from the picture the rider has improved symmetry and more symmetrical contact with the saddle. Visually this was shown by a more stable appearance on the bike with a dramatic decrease in rocking of the pelvis during the pedal cycle.
A Rider with General Discomfort
The pre fit images show a rider whose self selected position is sitting on the front end of the saddle. The pressure mapping shows this as well as the visual image of the rider showing an excessive percentage of the saddle off the back of the hips. With saddle position and handlebar position modifications the weight bearing position on the saddle was notably improved along with rider comfort.


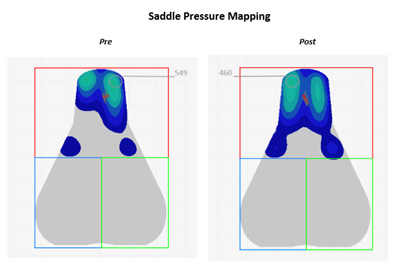
ISM Saddles
ISM saddles certainly have a unique pressure mapping profile. These saddles are often used by triathletes and road riders for their pressure relief benefits when in the low and forward position found on a time trial bike. This rider came in with complaints of right hip pain. You can see the pressure bias is certainly heavy on the right. There were several biomechanical and position factors contributing to the symptoms. These included leg length discrepency and a natural toe out posture which was addressed with cleat positioning. The same saddle was maintained but the position modified to a more appropriate height and offset. This combined with cleat and saddle adjustments and the rider achieved a more neutral position on the saddle and a more smooth pedal stroke.
Weightbearing Symmetry
Another example illustrates how pressure mapping can provide eyes on the saddle to provide insight into where a rider is placed on the saddle. This image on the left shows the rider shifted far forward on the saddle and rotated forward on the left side. Keeping the same saddle and modifying the position allowed this rider to sit more symmetrically on the saddle with decreased rotation of the pelvis. These rotations and assymetries can lead to improper muscle firing patterns and recruitment contributing to different patellofemoral pain syndromes and tendonits.
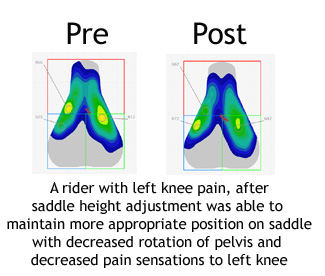
Riders with pre existing injuries
Riders make appointments to get a bike fit for a variety of reasons. Some come with pre existing injuries that are in varying degrees of rehabilitation and recovery. Bike fitting is one part of the recovery but should not be considered a panacea. Sometimes, as a rider recovers a follow up is required to update the position with the riders new abilities or feedback on their position. In this case, the initial fit was done without Pressure Mapping. The position was improved and the rider was able to return to training at a low level. However some persistent sensations around the left knee prompted follow up appointments. During the final follow up, Pressure Mapping was utilized and showed an asymmetrical sitting pattern and pelvis rotation on the saddle. Pressure Mapping allows the fitter to visualize position and movement of the pelvis on the saddle in ways that could not be done without this live imaging system. With some additional saddle position changes, the movement of the pelvis and therefore the leg became more symmetrical and the rider has resumed more normal training with ambitions of participating in his target event. The point to take home with this example is that each rider brings varying degrees of complexity to the fit session and the constructive feedback you give to your bike fitter prior, during, and after the fit is integral in a successful outcome.
Appointments can be made for full Personalized Bike Fits or shorter Saddle Demo and selection appointments using the gebioMized pressure mapping system.


You must be logged in to post a comment.